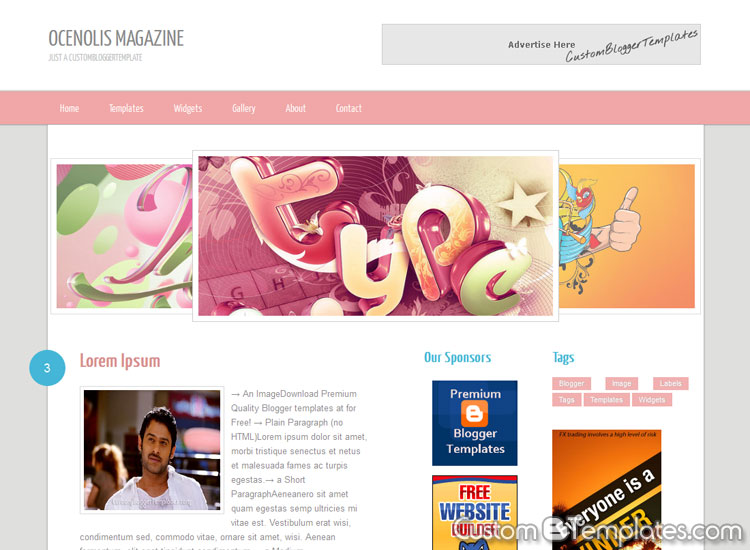
| Name | Ocenolis Magazine |
| Author | Harish |
| Designer | SimpleWPthemes.com |
| Instructions | Click here! |
| Features | 3 Columns, Fixed Width, Right Sidebar,white, pink, grey and turquoise, Navigation Menu,Slider Ready, Ads Ready, SEOptimized , Number Page Navigation, Social Icons, Auto Post Summaries, Adsense support, Beautiful Comments Section, Tested and compatible with all major browsers like IE, FF, Safari and Opera . |
| Share & Bookmark |
Template Instructions
Basic Instructions : How to Upload Blogger TemplateConfigure Metatags
All our Template comes with Seo Optimized tagsto Configure it, Search bellow lines in template and configure to your own!
<meta content='Your Blog Description here!' name='description'/>
<meta content='Your Keywords here!' name='keywords'/>
<meta content='Author Name here!' name='Author'/>
<meta content='Author Email Address here!' name='Email'/>
Your Keywords here! with your Blog Keywords
Author Name here! with Your Name
Author Email Address here! with Your Email Address
Configure Favicon
to Configure Favicon, Search bellow lines in template and configure to your own!<link href='Your FavIcon Url here!' rel='shortcut icon' type='image/vnd.microsoft.icon'/>
<link href='Your FavIcon Url here!' rel='icon' type='image/x-icon'/>Config Slider
1. Go to Blogger Dashboard > Design > Page Elements2. Edit Slider Widget
3. Add below Code and Customize it
<ul id="myRoundabout">
   <li><a href="#" rel="bookmark" title=""><img src="Image URL Here!" alt="" /></a></li>
   <li><a href="#" rel="bookmark" title=""><img src="Image URL Here!" alt="" /></a></li>
   <li><a href="#" rel="bookmark" title=""><img src="Image URL Here!" alt="" /></a></li>
   <li><a href="#" rel="bookmark" title=""><img src="Image URL Here!" alt="" /></a></li>
</ul>Add Search Box
1. Edit Search Widget2. Add below Code and Save it!
<div id="search">
<form action="/search" id="searchform" method="get">
<input type="text" onfocus="if (this.value == 'Search') {this.value = '';}" onblur="if (this.value == '') {this.value = 'Search';}" id="s" name="q" value="Search" />
<input type="image" style="border:0; vertical-align: top;" src="https://blogger.googleusercontent.com/img/b/R29vZ2xl/AVvXsEjNSTTzsbpinikoCrchjv6EXBJy2B_Gsr-UNo9F6gdrFmK5-x9IOEtQWtjo-l33iXRFo08aNFK5xnWOk9yl2dD37Pw80Km0pu6YbAGELbQv2h_uQ-tpgmbV_ncu0bnYwiJ2yWLpz7rYZgpn/s1600/search.gif" />
</form>
</div>Add FollowUs Widget @ footer
1. Edit FollowUs Widget2. Add below Code and Save it!
<ul id="topsoc">
 <li class="third">
    <a href="#" id="email">Subscribe via Email</a>
 </li>
 <li class="first">
    <a href="#" id="socrss">Subscribe via RSS</a>
 </li>
 <li class="second">
    <a href="#" id="twitter">Follow my tweets</a>
 </li>
</ul>


No comments:
Post a Comment